Tuesday, January 22, 2013

January, 2013 Work Weekend

There wasn't too much snow on the ground, but it sure was cold!

We had a good turnout at the first work weekend of the year. Besides the maintenance on the hardware, the MCRR Annual Meeting and monthly Board Meeting took place.

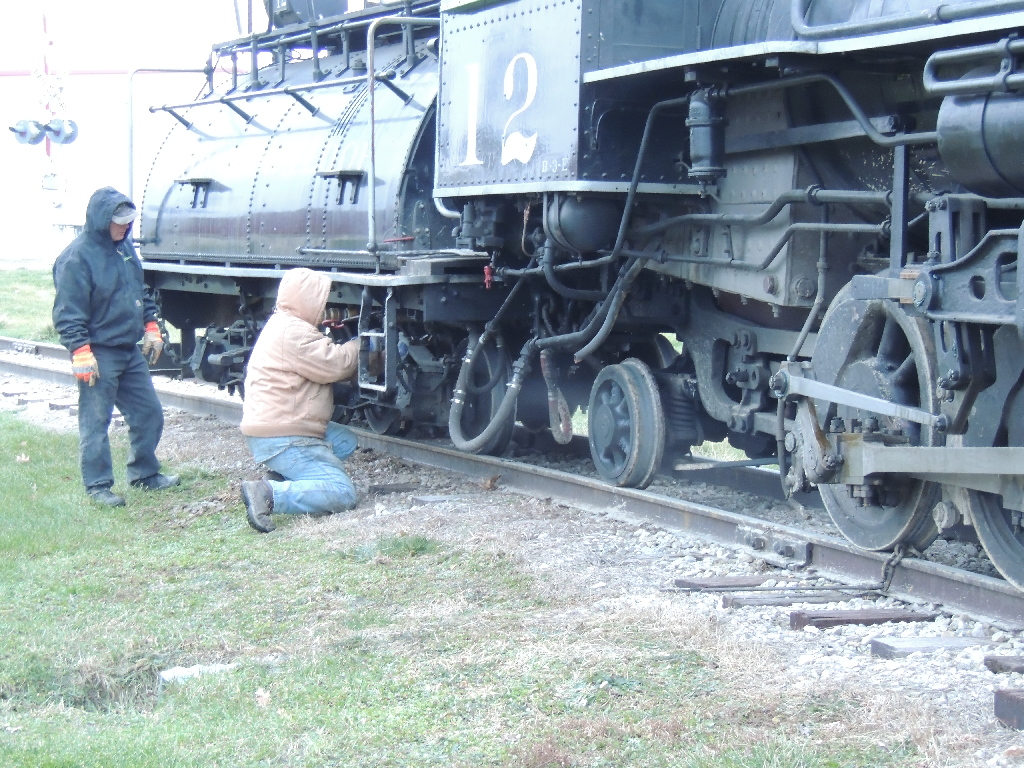
In the shop, No. 12 was the main thrust of the volunteers' efforts. The following series of pictures will give you an idea of what we worked on.

Not pictured is the clean-up of No. 12's connecting rods. During the December boiler washing, we gave the engine a quick pressure-wash in order to get some of the larger chunks of mud off the steel. Unfortunately, the stream of hot water also took off the oil film that protects the rods from rusting. Matt W., using a fine scouring pad and some diesel fuel, removed the surface rust and bits of grease from the rods leaving them bright and shiny. When he was done with the clean-up, a thin coating of diesel fuel was sprayed on the rods which should keep them (the rods, not Matt!) from rusting.

Last summer, one of the first things we noticed out of order on No. 12 was its firebrick. Between years of service and the trailer ride from Colorado, the bricks, although adequate for the season, definitely needed replacement.

Removing the firebrick entails climbing inside the firebox and hours of manual chiseling, air chiseling, and power descaling to remove the brick. Rex F. spent nearly all day on Friday doing that dirty task, but the results are rather spectacular.


With the brick out, we need to design the layout of the new brick, order the brick, and finally install the new brick.

While most of us were paying attention to No. 12, Chris P. decided the self-removing windows on No. 101, our gasoline Vulcan switcher and affectionately known as "the Squirt" (although it has "Little Squirt" lettered under the cab windows) needed some help. Last month the Squirt gained a real muffler; this month it gained new glass, rebuilt frames, and a side view mirror to assist the engineer.


The engineers were less than pleased with the action of No. 12's throttle, especially with its low speed control. The low speed control is essential for our operation during Midwest Haunted Rails and North Pole Express.

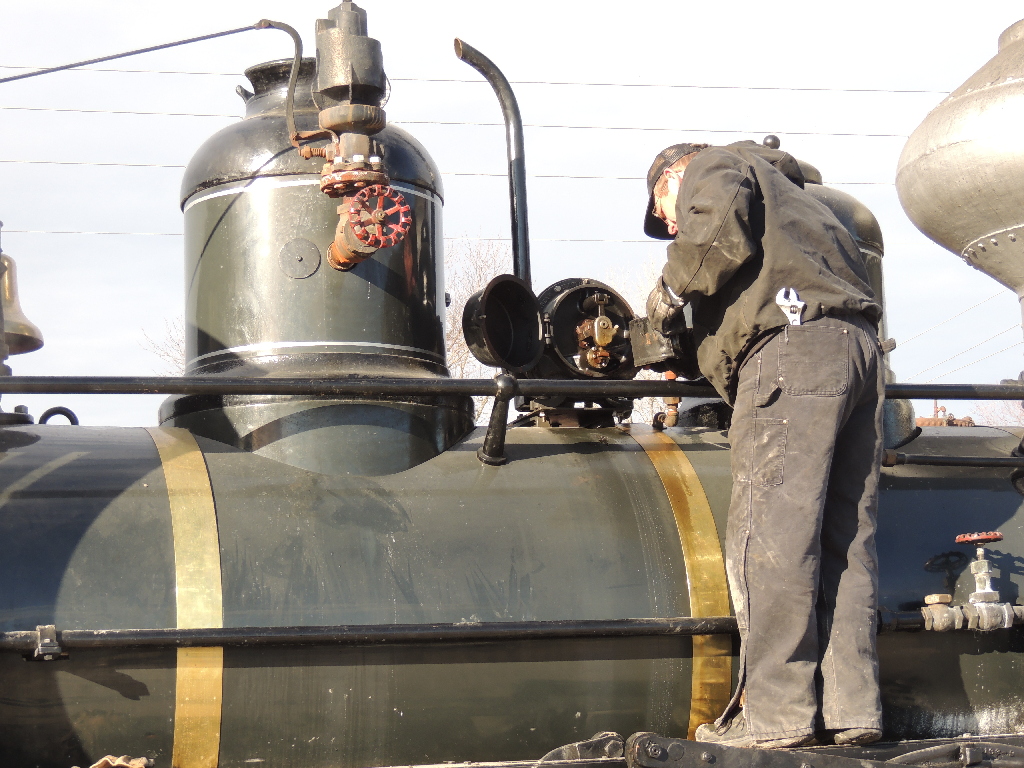
To gain access to the steam valve, we removed the steam dome lid...


...and placed it on the floor next to No. 12. You can see the large whistle still affixed to the lid!


If you are wondering what it looks like "down there" you can see the steam valve, linkage, and flues.

There was a massive amount of play in the linkage. The engineer's steam throttle moved about 6" at the handle before the steam valve actuated! No wonder the engineers were having a fit.


The steam valve is not the original Baldwin valve; somewhere in this engine's approximately 80 year history, the normal spool valve went missing and a large ball valve was fitted in its place. Besides the massive amount of play in the linkage, ordinary ball valves lack a uniform increase of fluid flow as they are opened. Fixing the linkage is relatively easy; fixing the ball valve is something else. At the present time, we are likely to install one of our spare spool valves in place of the ball valve.

Another focus point on No. 12 is its air compressor. When not pumping air, a large stream of steam was constantly venting. When it was pumping air, lots of steam spewed from every crack and crevice. The staff removed the pump to inspect and repair any mechanical problems. There is an excellent chance we will exchange the single cylinder pump for a cross compound pump similar to the one on No. 6.

In order to remove the pump, a lifting bracket had to be fabricated. Dave O. welds the pieces of the lifting bracket together.


With the hoisting bracket installed, some of the surrounding walkway removed, and all of the various pipes uncoupled, Elliot H. attaches the overhead crane to the lifting bracket.


Rex F. and Randy V. continue the positioning of the compressor to a spot in front of the welding table.


In order to free the overhead crane, Elliot H. and Rex F. fabricated a stand for the compressor. The stand allows access to most of the compressor. By leaving the lifting bracket on the steam cylinder head, the compressor assembly can easily be moved to a different location in the shop.


A few other projects took place: Roger R. repairs an electric drill.


Wayne P. cleans the burner from No. 6.


-steam.airman

Sunday, December 23, 2012

December, 2012 Work Weekend + North Pole Express

This blog entry covers the December Work Weekend (although there is a definite lack of photographic evidence!) and three weekends of the 2012 North Pole Express.

As part of the upcoming North Pole Express, MCRR volunteer Elliot H. enhanced the cab curtains which were built for the 2011 NPE. While the curtains kept the cab crew warm they had a challenge when it was time to run No. 6 in reverse. Lacking windows, the engineer's rear curtain had to be unsnapped to allow a clear view of the rear of the engine. The constant unsnapping and snapping took its toll on the curtain, leaving only a few of the original snaps in place by the time NPE 2011 was complete.

If you have a look at the January, 2012 Work Weekend blog entry, you will see some of the enhancements made to the curtains. Besides the engine number applique nearly every edge was reinforced to cope with the snapping and unsnapping. The reinforcements solved the strength issue, the mere fact that the curtain needed unsnapping to back the locomotive up was still a bother.

Solution? Install clear vinyl windows in the rear curtain sections. The next two photos shows a window being installed in the curtain and the completed product.


The engineers thought the addition of windows was great. Now, the cab stayed warm and they could see behind the engine. A bonus was that the cab was much brighter during daytime operations.

During the November Work Weekend, both locomotives (No. 12 and No. 6) had their boiler and tender plugs installed but neither were "watered." Starting Thanksgiving Friday, No. 6 was readied for use while No. 12 was bypassed due to some pending maintenance. The first task on No. 6 to complete was fueling the tender, watering the tender, filling the boiler and finally testing the boiler for leaks. Once that was completed, a natural gas fire was set in its firebox to start the warming process.

On Thanksgiving Saturday, we pulled No. 6 outside at 5.30 AM to start a natural gas fire while we had breakfast. We knew it was cold that morning (16F!) with a steady 10MPH northwesterly wind it but didn't hit us right then as to a problem we would soon discover.

After breakfast we extinguished the natural gas fire and with the assist of the gasoline air compressor, lit an oil fire to get the boiler on its way to operating pressure. At about about 15 PSI of boiler pressure we weaned the fire from its air compressor assist. With the air compressor disconnected, we had steam available to get the fuel tank heater running.

Note: We installed the tank heater due to fuel flow problems encountered on the sub-freezing weekend of the 2011 NPE. The tank heater was installed throughout the late winter and spring work weekends and was minimally tested during the Old Threshers' Reunion and Midwest Haunted Rails. There was every indication it would work well and allow us to use the heavy (less expensive) oil instead of light (more expensive) fuel oil.

We turned the steam valve on -- and nothing happened!

Residual water in the steam line had frozen in that 90 minutes or so from when we pulled the locomotive out of the shop. By disconnecting the tank heater's flexible steam line, we determined the blockage was between the fireman's steam manifold and the tender (that is, not within the fuel tank). A heat gun and a rosebud tipped torch solved that problem and the tank heater was soon on its way to doing its job.

During the time the tank heater was serviced, the boiler reached sufficient pressure to test the injectors. It was little surprise that its lines were frozen as well. Using a flexible steam hose, we easily thawed the injector lines and continued to ready the locomotive for the 11.00 AM train.

Student Fireman Rex F. services the steam turbine.


We had the locomotive completely serviced and ready to move by about 10.00 AM. Engineer Dave R. arrived and we were ready to move!


After connecting the coaches, Engineer Dave ran the train to the North Depot to fetch our first load of passengers. A few passengers arrived after the train parked at the North Depot and had to walk to the fireman's side of the train to enter the coaches.


After we leave the train at the North Pole (known the rest of the year as the South Station), the locomotive waits on the South Station's west side until the passengers are ready to return to the North Depot.


Ashley D, our "Snow Princess," is first to meet the passengers as they disembark at the North Pole.


One of the "things to do" while at the North Pole is to visit Santa...and where does Santa hang out? Well, this is a railroad, so of course Santa is in the caboose!


After the train leaves the North Pole (that is, the South Station), it carries the passengers back to the North Depot (North Pole? North Depot? South Station? This is confusing me!).

While one side of the train discharges passengers, the other side loads the next train's passengers.


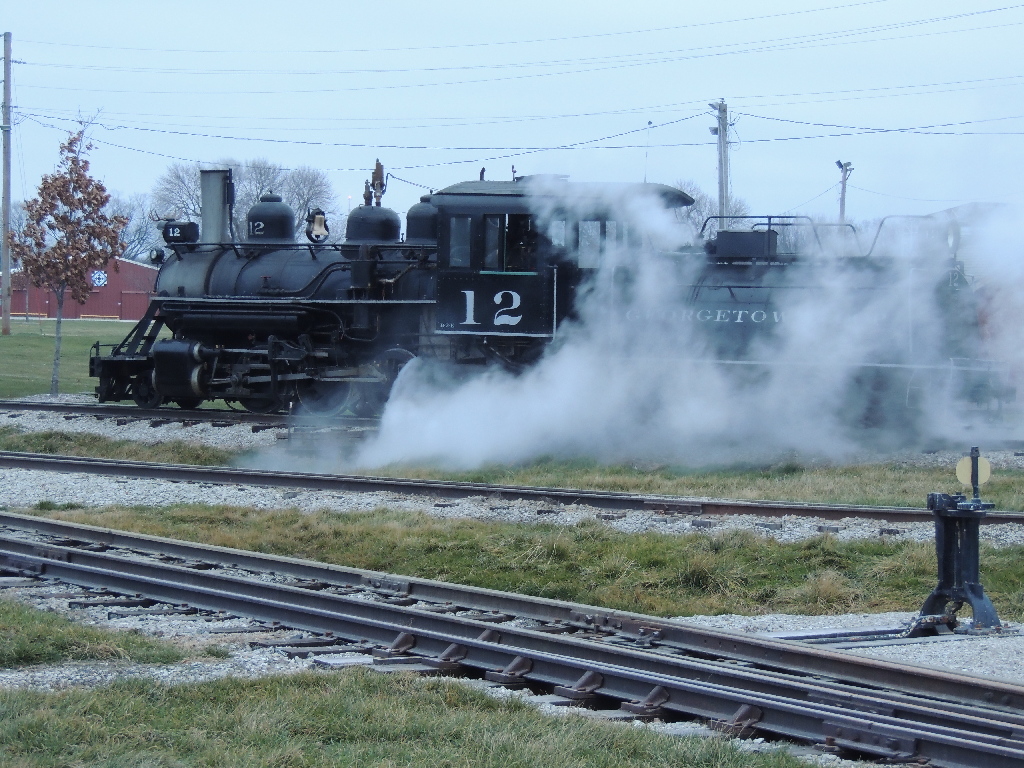
Here is an interesting series of pictures: No. 6 backs up and connects to No. 12. Apparently No. 12 needed fuel and wasn't ready to move under its own power, so No. 6 pulled it over to the fueling station. Once free of its load, No. 6 took a few laps on its own.


No. 12, fueled and ready to go, connected to the coaches, met up with No. 6, and the two locomotives pulled the coaches around the track so both could stop for water.


Fireman Elliot H. gets to sit in the engineer's seat while the tender takes on water. His student fireman kept the boiler at the correct pressure while parked at the watering spot.


Watered and fueled, the complete train makes it way to the North Depot for the first set of passengers of the day.


After leaving the coaches at the North Pole (or is that the South Station?), the locomotives run a few light laps.


Engineer Abe C. at the throttle of No. 12 as it passes the man lift for this odd photo angle.


Passing the east gate.


On Monday, December 10th, while everybody thought the 2012 North Pole Express was over, a few cab crew (also known as shop crew) stayed an extra day to put the locomotives away for the year, in a seasonal ritual known as "boiler washing."

What is boiler washing? Besides the obvious, the general steps are:

1. Drain the water from the boiler and tender.
2. Wash the smoke box and other outside elements of the locomotive.
3. Fill the boiler with compressed air to blow water from the steam cylinders, turbine, air pump, injector lines, and tank heater lines.
4. Remove the boiler plugs.
5. Wash the interior of the boiler.
6. Insert 110VAC blowers in several of the boiler plug ports to dry the interior.

The next few pictures are "step 1."


The next few pictures are "step 2."


The cameraman was too lazy to get pictures of steps 3 through 6!

The next four are special to this year's boiler washing. In anticipation to some maintenance on No. 12, it was decided that the tender be removed from the locomotive for easier access in and around the locomotive for the winter/spring projects.


I must admit, No. 12 doesn't look quite the same when it is separated from its tender.

-steam.airman 
(Pictures courtesy steam.airman, John G, and Braden G.)